Calibration is required to align the pointer device co-ordinate system with the video co-ordinate system. When using an absolute pointer device, such as a touch screen monitor, the point of contact should be activated under the stylus when it is in contact with the pointer device.
For USB HID devices, since UPDD V6, the driver reads the X and Y co-ordinate range from the HID Report descriptor held in the USB touch device and uses this range to calculate default calibration data which is then stored in the UPDD Settings file. In most cases we would expect this default calibration data to give accurate calibration. However, if the stylus is not accurately placed when touched then calibration will be required.
This document covers the calibration feature in UPDD Version 6 and above.
Depending on the release of the version 6 driver you may or may not have control over the calibration procedure as follows:
| Release |
Calibration characteristics |
| pre 6.0.364 |
Implements a simple calibration process that uses a 4 point, 10% margin calibration procedure to determine the screens orientation but only actually records 2 calibration points based on raw data. |
| post 6.0.364 |
Implements an advanced algorithm that caters for devices with poor linear characteristics. This algorithm is dependent on the accuracy with which the calibration is done so it is very important to calibrate with a stylus that can select the exact center of the calibration cross. Number and position of calibration point can be set as discussed in 'Settings' below. |
Invoking Calibration
The calibration program is called 'UPDD Calibrate'.
The calibration procedure can be invoked in a number of ways
- It can be invoked from the UPDD Console dialog
- You can also invoke the UPDD Calibrate program from within the resident folder or via a command line, such as in these examples:
| Windows |
”C:\Program files (x86)\UPDD\UPDD Calibrate.exe” device=1 |
| MacOS |
/Applications/Utilities/UPDD\ Calibrate.app/Contents/MacOS/UPDD\ Calibrate device=1 |
| Linux |
./upddenv ./UPDD\ Calibrate device=1 |
Running UPDD Calibrate without any parameters the calibrate procedure will, in a multi-monitor environment, identify all touchscreens to make the touchscreen/desktop association. Thereafter it will calibrate all active UPDD devices by showing the calibration screen for each device on its associated monitor.
The calibrate program can take two arguments:
identify - identifies active UPDD devices and creates relevant monitor associations. Only required in multi-monitor environments.
device=n - calibrates a specific UPDD active device. The calibrate screen is shown on the monitor associated with the device
- The calibration procedure can also be invoked from any UPDD Client application using the UPDD API as described here.
Calibration procedure
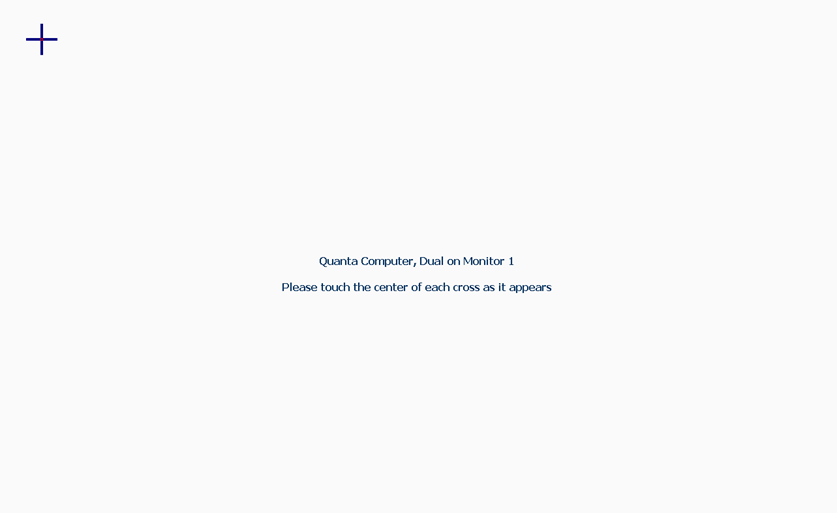
If working in a multi-monitor environment, and running the calibrate program without specifying a specific device, the calibration procedure will attempt to identify each touchscreen and will show a single cross in the middle of each discovered monitor. Touch this cross using the pointer device (touch screen or pen) if the monitor has an associated pointer device or select the 'Next' or Alt/Option+x (lower case for Mac) option to skip this monitor. For a single monitor system all UPDD active devices are associated with Monitor 1.

The calibration screen will be invoked for each identified device displaying calibration points that should be selected in turn.
The calibration sequence for each cross is:
|
Initial cross
|
|

|
When the calibration margin is 5% or more for each calibration point a target (cross) is shown.
|
|
Initial touch
|
|

|
As soon as any data is received a light coloured circle is shown around this target.
|
|
Good data sample
|
|

|
When the calibration point is ready to be accepted (enough time has passed while touching) a dark circle is shown around the target.
Note: If the touch is not sufficiently long in duration the original cross icon is re-shown.
|
Important notes:
- UPDD disables pointer movement during calibration so there should be no cursor movement. However, if the pointer is moving but the calibration touches are ignored it is likely that a different driver is in control of the device, not UPDD.
- In some case the calibration screen may not cover the entire screen but the calibration points should be placed in the correct location. If the calibration screen is distorted or the calibration points are not shown in the correct location then try the text based calibration using the command upddutils calibrate.
- The time taken to record a touch sample is 750ms. The sample is actually taken at the point when the circle turns blue.
- If the defined monitor is not found monitor 1 is assumed.
- To clear calibration data held in the UPDD settings file as extracted from a USB HID device use the command upddutils setall hid.report_descriptor.crc "" as this will force the driver to reread the data held in the HID Reports Descriptor and recalcuated the default calibration data.
Exit codes
0
Success
2
Calibration timed out
3
Escape
4
Syntax error in command line
5
Failure to connect to driver
6
Device not found (invalid device handle)
7
Device
not connected
8 Another instance already running
Calibration settings
The following UPDD settings relate to the calibration process:
| Setting |
Description |
| calibration_ cancel ** |
Show a cancel button at the end of calibration at same time as confirm button. Default 0 = no cancel button shown, 1 = show cancel button. |
| calibration_confirm ** |
Require a confirmation button press at end of calibration. Default 0 = no confirmation, 1 = confirmation. |
| Calibration_confirm_text ** |
Show the text "Please press the button above to confirm calibration" when the confirm calibration button is visible. Default 0 = confirm text not shown, 1 = confirm text shown. |
| calibration_margin |
The margin used for calibration points (expressed as a percentage of the pixel resolution) from the edge of the calibrated area on which the current calibration is based - maintained by the driver - do not manually update. |
| calibration_margin.next |
Used to define the calibration margin (expressed as a percentage of the pixel resolution) used for the next calibration. If blank the value of calibration_margin is used. Can be set to any figure but a range of 1 to 15 is realistic. 10% is the default. Note - You will lose part of the calibration cross with small margins (<5%) but as long as you can touch the center red dot all should be OK. This may be difficult on some systems at 0% being the extreme corner.
In this example the margin is set to 1 percent on a 1980 x 1080 desktop resolution using the command 'upddutils set calibration_margin.next 1' so the 1st calibration point is drawn at 18,9 (zero based) pixel location:
 with partial circle drawing when touched with partial circle drawing when touched 
|
| calibration_min_delta |
Number of raw points that must separate a calibrated point from the previous for it to be accepted (ignores contact bounce during calibration) |
| calibration_points |
The number of points on which the current calibration data is based - maintained by the driver - do not manually update. |
| calibration_points.next |
The number of calibration points used for the next calibration. If blank then the calibration_points setting is used. Can be set to 4 (default), 9 and 25. |
| calibration_timeout ** |
The number of seconds that the UPDD Calibrate program will wait without input before terminating. Default 10 seconds. |
| Calxn |
Calibration X touch co-ordinate n - maintained by the driver - do not manually update. |
| Calyn |
Calibration Y touch co-ordinate n - maintained by the driver - do not manually update. |
| Calibration.force_geometry |
Can be set to screen or available.
By default UPDD uses the 'screen' geometry to determine the placement of the calibration window in Windows and MacOS and the 'available' geometry on Linux (the screen geometry minus menu bar and similar areas) is used. This setting allows the non-default option to be used.
For example on a Windows system with an unusual configuration we once found that the available geometry had to be used.
|
** are global (nodevice) settings, all others are device settings.
Calibration settings, that can be defined by the end user, can be set using the command line interface, e.g. upddutils nodevice set calibration_confirm 1
Defining initial calibration settings
UPDD caters for three device types, USB HID compatible, USB legacy and Serial.
For USB HID devices the HID Report Descriptor read by the driver should specify the co-ordinate range of the device and this is used to set calibration values and should result in accurate calibration.
For the other device types the calibration procedure will need to be performed to set calibration values where calibration is inaccurate.
Once a good set of calibration values are defined they can be saved and restored and can form part of a custom installation procedure where appropriate.
If required good calibration data can also be preset in our driver production system for a given device configuration so that an installation package holds accurate calibration data for the same device type.
Predefined, accurate calibration data is useful if you are setting up systems that utilise the same device and want the device to be calibrated after installation. This is particularly desirable if you need / want to avoid running the calibration procedure, such as in an unattended or remote installation.
Save / Restore calibration settings
The calibration data is stored in a number of UPDD settings, as described above.
Since UPDD release 6.0.460 you can export / import calibration settings as described here.
You can also use the UPDD Command Line interface, get and set commands to manipulate calibration settings.
For example, to extract all the calibration settings use the following command:
upddutils get cal* (pass >filename to save to a file e.g. upddutils get cal* >caldata)

Should there be a requirement to reapply these settings at a later stage, say after re-imaging a system and wanting to avoid a manual calibration
Use upddutils set as shown below:

If the calibration settings have been saved to a file you could always use an edit utility to do a global update to add 'upddutils set' and remove the ':' to create a script file to apply the settings.
Multi-monitor considerations
When dealing with a multi controller system; it will be necessary to associate the settings with the correct device.
In situations where the device id might change (e.g. over a re-install) use the connection_key setting to identify the device.
In the example below we see the connection_key for device 1

You should record the connection key at the time of saving and use this to identify the device number at the time of restoring.